While cleaning up my craft room recently I stumbled upon a bag of small crochet granny squares.
I can’t remember where I acquired them. Maybe they were a lucky thrift shop find, or someone passed them on to me after cleaning out an elderly relative’s home. (I’m often the beneficiary of craft supplies that were collected over a lifetime by a friend of a friend’s aunt who is downsizing.)
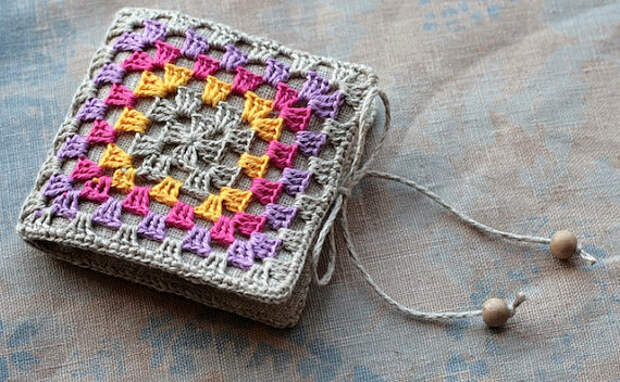
In any case, they are colorful and beautifully made, but there really isn’t enough of them to make a substantial project. Most of them are just 3″x3″ which is quite small, but the perfect size for using them as decorative embellishments.
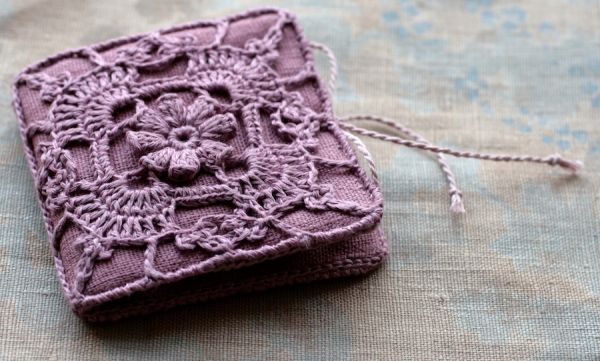
I’ll be using these assorted granny squares as inspiration for several small craft projects in the coming months, starting with a vintage-style needlebook.
If you don’t have a bag full of granny squares laying around in your craft room, I’ve got a few suggestions for procuring your own.
1. Make some!
Even if you are new to crochet, granny squares are one of the simplest crochet projects for a beginner. There are 100’s of tutorials and videos online with instructions for how to crochet granny squares. This free e-book by Shelly Husband is a great place to start.
To make a granny square in a similar size to the ones I have I recommend using a 5ply (sport weight) yarn with a small 3mm-3.5mm crochet hook.
2. Buy some ready-made
There are plenty of sellers on Etsy selling loose granny squares that are either vintage finds or made in small batches especially for embellishing projects like these.
I’ve found a few listings with granny squares that are a suitable size for this project.
How to make a Granny Square Felt Needle Book
This compact felt needlebook is easy to sew together either by hand or with a sewing machine. If you don’t have a spare crocheted granny square handy, why not embellish it with a decorative patch, some embroidery, or a pretty fabric applique.
So practical to store your needles safely and keep them handy in your craft project bag.
You will need:
- Crochet Granny Square (about 3″/7.5cm)
- Felt in matching colors – wool or wool blend
- Ribbon – 16″/40cm or alternatively button or press stud
- Scissors or Rotary cutter, ruler, and mat
- Pinking shears (optional)
- Sewing thread in matching color
- Sewing machine
- Pins
- General sewing supplies
How to:
1. The felt into the following sized pieces: Outer cover 8″x4″ (20x10cm), Inner cover 7.5″x4″ (19cmx10cm), Insert 7″x3″ (18cmx7.5cm).
2. Machine sew or hand stitch granny square onto the front outer cover. Try to center it evenly.
3. The ribbon into 2 x 8″/20cm pieces to create two ties. Pin each tie between outer in inner covers about halfway down the short sides of the cover.
4. Stitch inner and outer cover together close to the edge as indicated by the dotted line. Try to use a matching thread color to the front cover. Make sure you catch the ribbon.
5. Pin the insert centered on the inner cover, and stitch in place.
6. Trim edges of insert with pinking shears (optional)
Add needles, pins, and any other sharp tools you need to wrangle, and you are done!
To close, just tie ribbons together.